How to Make Japanese Curry Roux
Learn how to make homemade Japanese curry roux in 30 minutes with five ingredients— customize the heat, freeze cubes, and unlock rich, comforting curry anytime.
Dish: Japanese Curry Roux
Variant: How to Make Japanese Curry Roux
- Total time
- 35 min
- Active time
- 5 min
- Yield
1, 1 block (8 cubes per block; 7 oz, 200 g; enough for 4 cups liquid)1, 1 block (8 cubes per block; 7 oz, 200 g; enough for 4 cups liquid)
- Difficulty
- Medium
Ingredients and Constraints
Ingredients
- Optional
Ingredient watchpoints1 watchpoint
Short requirements and tradeoffs to check while gathering ingredients; detailed source notes stay expandable.
Cayenne Pepper
½ tsp cayenne pepper ((optional))
The source row includes a form, size, temperature, preparation, or handling detail.
Details and source
Additional ingredient notes
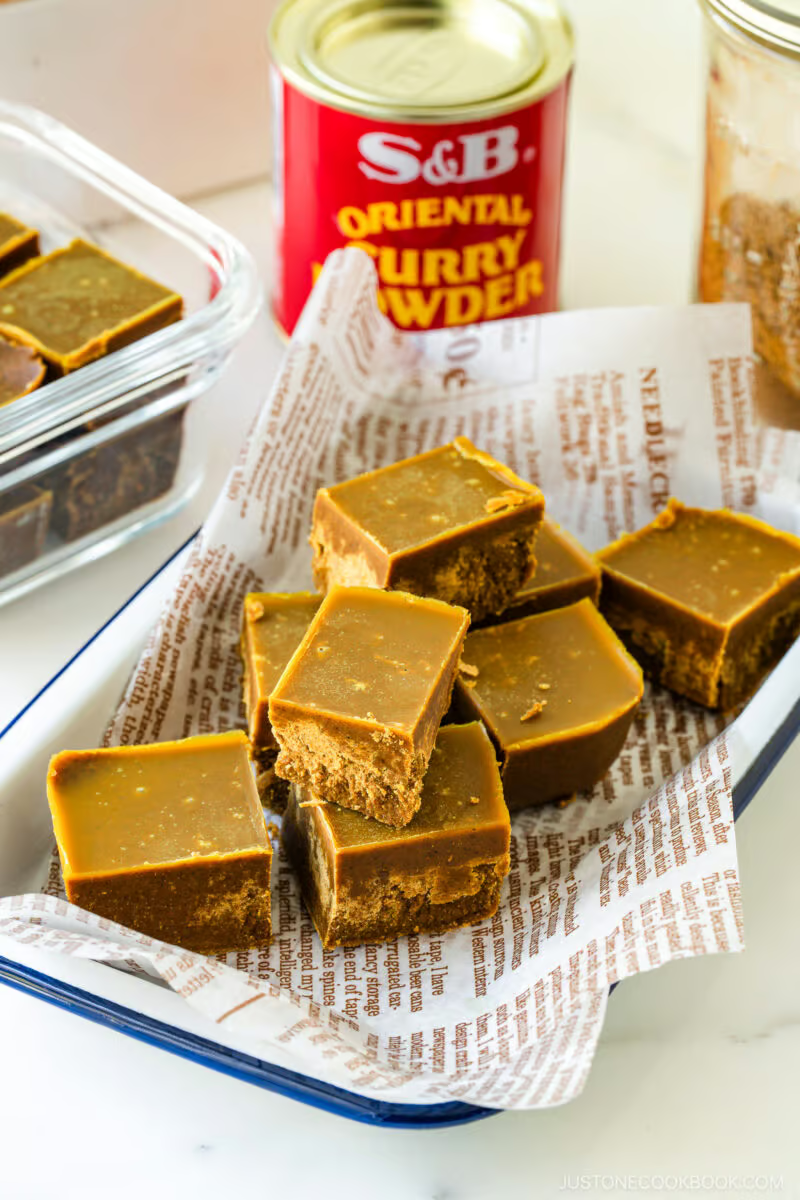
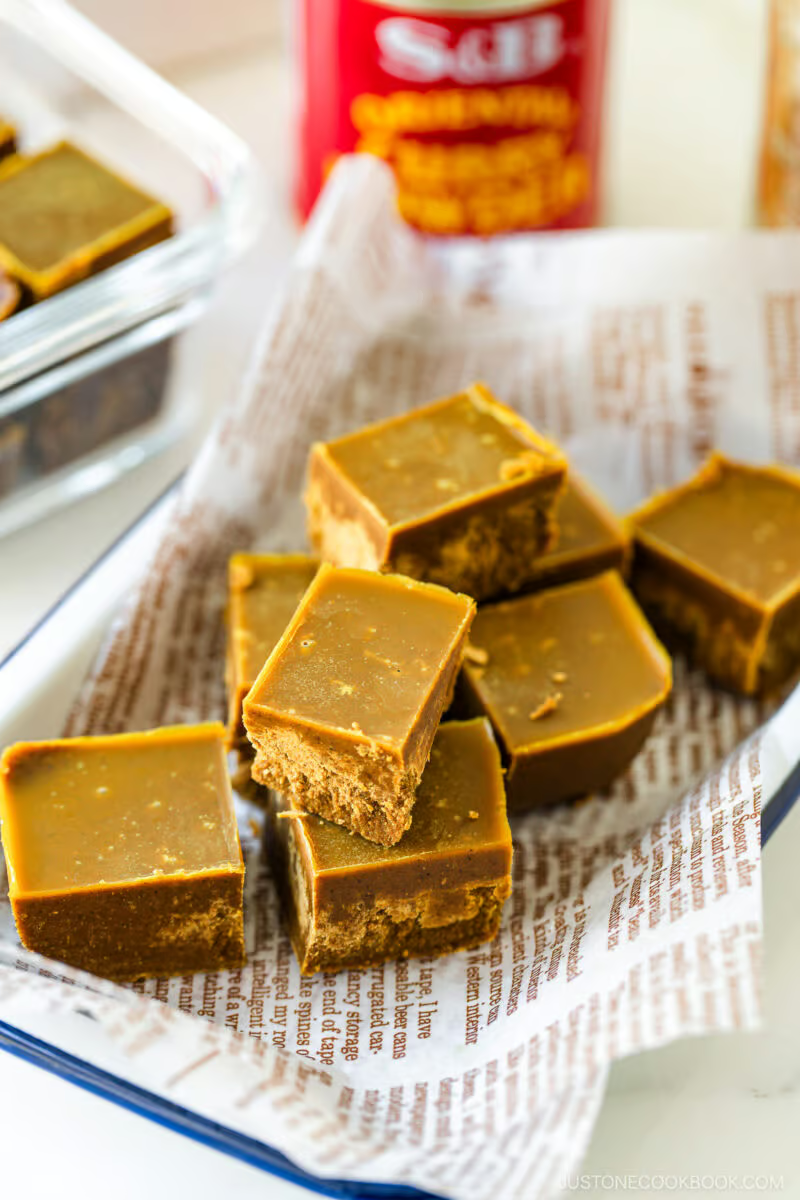
Ingredients for Japanese Curry Roux
Unsalted butter All-purpose/plain flour S&B Japanese curry powder, or make it yourself with my recipe Garam masala Cayenne pepper – optional Find the printable recipe with measurements below.
JUMP TO RECIPE Substitutions Unsalted butter: I like to add salt later when cooking my curry sauce, so I use unsalted butter for the roux. If you use salted butter, reduce the amount of salt you add to the curry. S&B Japanese curry powder: This mild, slightly sweet curry powder is my favorite brand. You can find it on Amazon or at Japanese markets. If you can’t get it, try my homemade Japanese Curry Powder recipe. Other curry powders work too, but they won’t give the same authentic Japanese flavor. Garam masala: A warming Indian spice mix with cardamom, cloves, cumin, coriander, turmeric, nutmeg, and black pepper. If you don’t have it, you can use the individual spices or add more curry powder instead.
Substitutions
Unsalted butter: I like to add salt later when cooking my curry sauce, so I use unsalted butter for the roux.
If you use salted butter, reduce the amount of salt you add to the curry. S&B Japanese curry powder: This mild, slightly sweet curry powder is my favorite brand. You can find it on Amazon or at Japanese markets. If you can’t get it, try my homemade Japanese Curry Powder recipe. Other curry powders work too, but they won’t give the same authentic Japanese flavor. Garam masala: A warming Indian spice mix with cardamom, cloves, cumin, coriander, turmeric, nutmeg, and black pepper. If you don’t have it, you can use the individual spices or add more curry powder instead.
Variations and Customizations
Dairy-free: Swap in vegan butter.
Gluten-free: Use a cup-for-cup gluten-free flour blend. Extra depth: Sauté minced garlic, ginger, or onion before adding the flour. Thicker sauce: Increase butter and flour in equal amounts for a heartier cube.

Ingredients US CUSTOMARY METRIC 1X 2X 3X
3.5 oz unsalted butter (7 Tbsp) 3.5 oz all-purpose flour (plain flour) (about ¾ cup; please weigh your flour; click the Metric button for weights; or learn how to measure flour with a measuring cup; use GF flour or rice flour for gluten-fre
Before You Cook
Constraints, controls, and warnings to review before starting.
Decisions before cookingDetails1
Reviewed comparisons and tradeoffs that affect the path before the first active step.
Comparison photos
Photos that show recipe tests or side-by-side results.
Source: How to Make Japanese Curry Roux (Video) カレールーの作り方
Method Overview
Structured method notes that are separate from the step timeline.
Cook
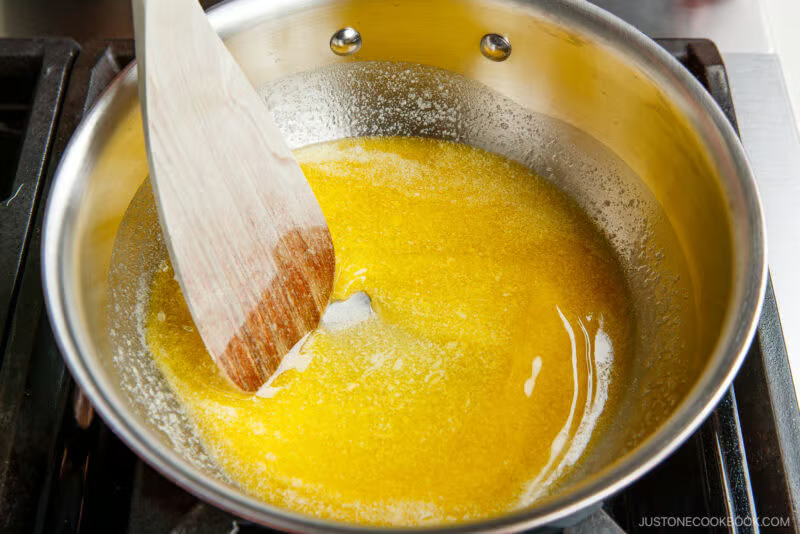
Melt butter in a saucepan over medium heat and stir in flour with a wooden spoon to combine.
Mix and cook it for 20–25 minutes until golden brown (see the next step to see the golden brown color). Add the spices, then whisk and cook for 30 seconds.

Show 3 more media items
Nami’s Recipe Tips
A deep color means richer, nutty, caramel notes in your curry.
Keep the heat moderate and give it the full 20–25 minutes. Roux can scorch in seconds.
How to Use Japanese Curry Roux in Your Recipe
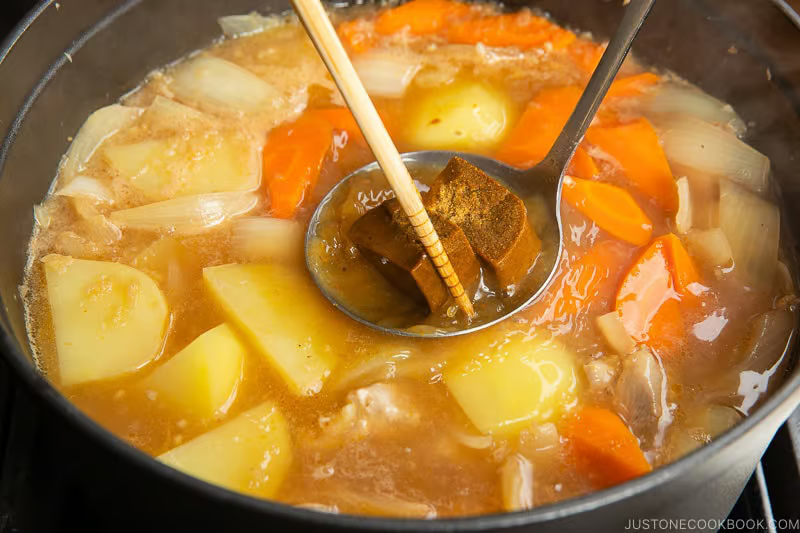
How much to use: I find that 6–7 cubes per 4 cups (1 liter) of broth/water is about right.
This is equivalent to one box of store-bought curry roux that calls for the same amount of liquid. Add to your curry pot: Dissolve the roux, 1 or 2 cubes at a time, in a ladleful of hot broth before releasing it to the pot. If the homemade roux hasn’t solidified yet, you can add it directly to the broth. Thicken: Simmer over low heat for 5–10 minutes. If it doesn’t thicken, add more roux. It’s possible that the veggies in your recipe released extra moisture, so please adjust based on the ingredients you’re cooking. Adjust the seasoning: Taste the curry after the roux is fully dissolved and incorporated, preferably after 3–5 minutes of simmering. Add the salt or spice to your liking. This homemade roux recipe does not contain any salt.
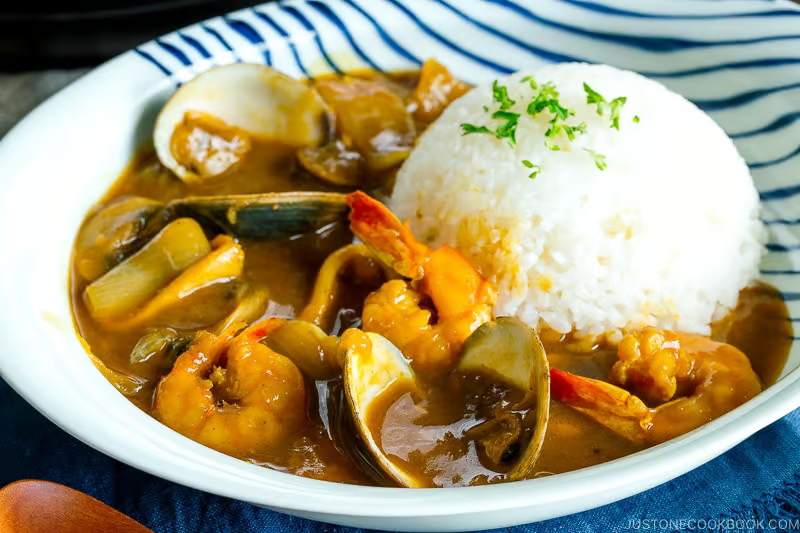
What to Make with Japanese Curry Roux
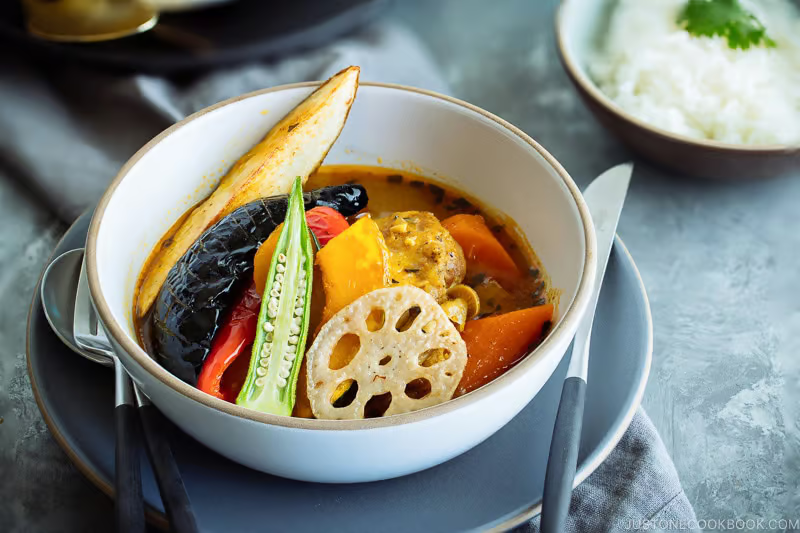
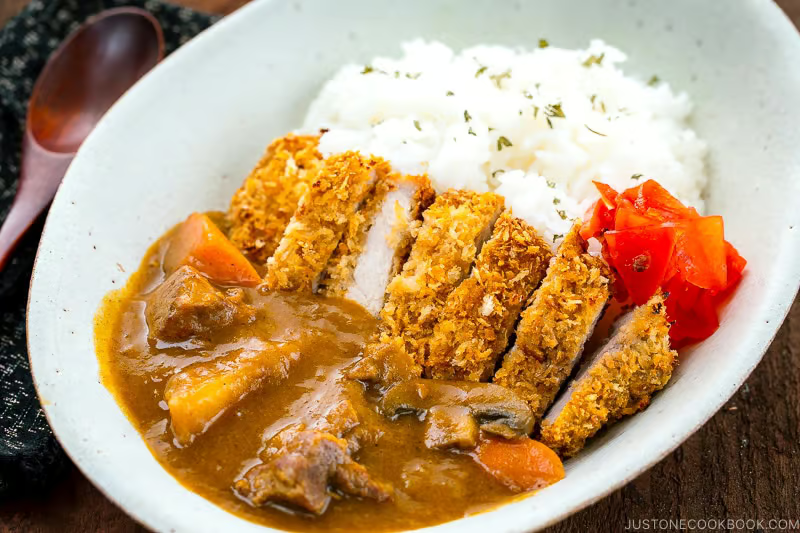
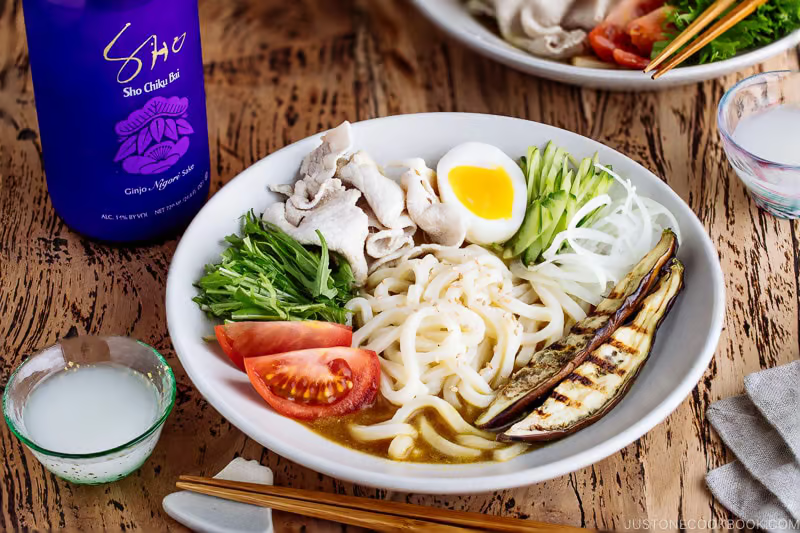
With the homemade curry roux, you can cook a myriad of Japanese curry recipes anytime: Sapporo Soup Curry Katsu Curry Pressure Cooker Japanese Seafood Curry Cold Curry Udon.
Why is my Japanese curry sauce watery?
Too little roux, excess liquid, or watery vegetables can keep it runny.
Typical veggies include carrots, potatoes, and onions. Stir in another cube and simmer until the sauce coats the back of a spoon.
Source video
Source video
Method Timeline
Prep
ActivePrep
5 min
Prep time from the source recipe card.
Cook
ActiveCook
30 min
Cook time from the source recipe card.
Total
PassiveTotal
35 min
Total time from the source recipe card.
Step 1
Before You Start: I highly encourage you to weigh your flour and butter using a kitchen scale. For weights, click the Metric button above. If you don't have a scale, here's how to measure flour with a measuring cup: Fluff the flour with a spoon, sprinkle it into the measuring cup, and level it off. Otherwise, you may scoop more than you need.
Step 2
Gather all the ingredients.
Step 3
In a small saucepan, melt 3.5 oz unsalted butter over medium-low heat (you can also add cubed butter and start with medium heat, so it melts faster).
low heatStep 4
When the butter is completely melted, add 3.5 oz all-purpose flour (plain flour). With a blunt-end wooden spatula, stir to combine the butter and flour.
Step 5
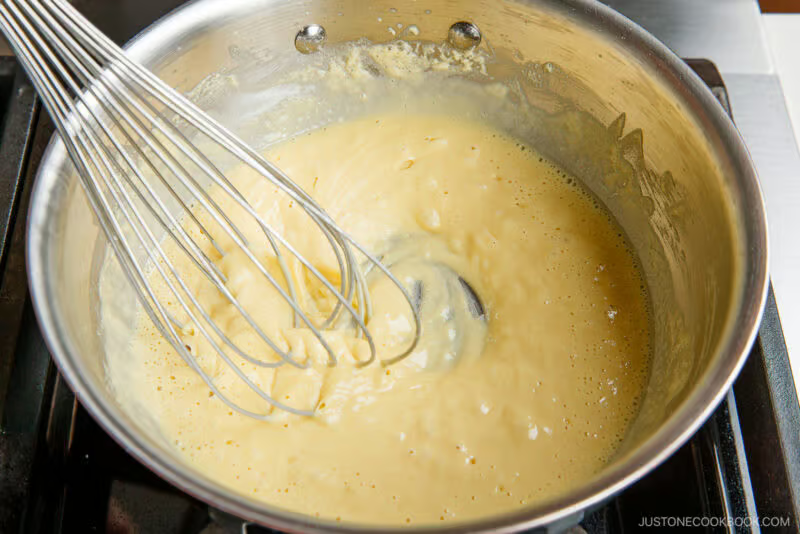
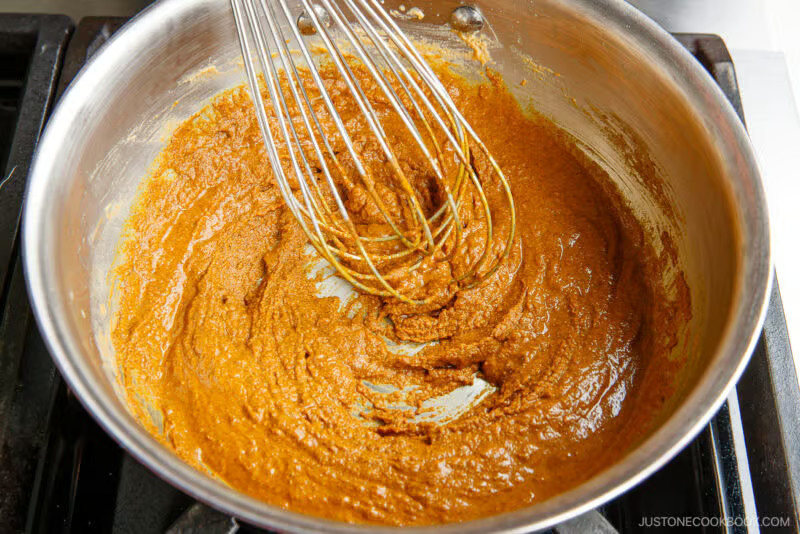
Soon, the butter and flour will fuse and swell. For the next 20–25 minutes, control the stove's heat to around medium-low heat, and stir constantly because the roux burns easily. Nami's Tip: If the roux starts separating, switch to a whisk and mix vigorously.
low heat
Image detailsSoon, the butter and flour will fuse and swell. For the next 20–25 minutes, control the stove's heat to around medium-low heat, and stir constantly because the roux burns easily. Nami's Tip: If the roux starts separating, switch to a whisk and mix vigorously.Just One Cookbook · How to Make Japanese Curry Roux (Video) カレールーの作り方Dev reference Checks1
TimingInfoTiming20–25 minutes
Target: 20-25 minute
Expected state: For the next 20–25 minutes, control the stove's heat to around medium-low heat, and stir constantly because the roux burns easily.
Why and source
This step has reviewed source-backed guidance.
Step 6
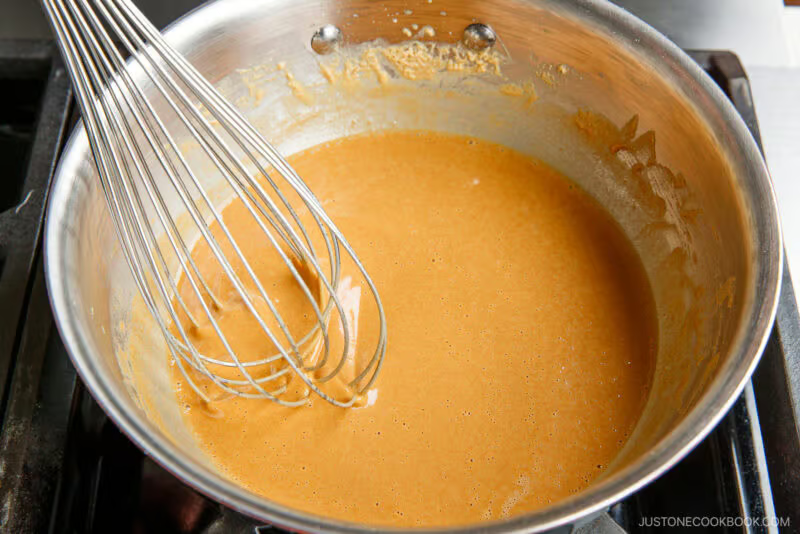
The roux will turn golden brown quickly toward the end. See the "brown roux" color in the next step. Nami's Tip: Cooking the flour in butter until golden removes its raw, starchy taste and adds a warm, toasty flavor that makes your curry richer and smoother.

Image detailsThe roux will turn golden brown quickly toward the end. See the "brown roux" color in the next step. Nami's Tip: Cooking the flour in butter until golden removes its raw, starchy taste and adds a warm, toasty flavor that makes your curry richer and smoother.Just One Cookbook · How to Make Japanese Curry Roux (Video) カレールーの作り方Dev reference Visual cue
until golden removes its raw, starchy taste and adds a warm, toasty flavor that makes your curry richer and smoother.
Checks1
Visual cueInfoVisualuntil golden removes its raw, starchy taste and adds a warm, toasty flavor that makes your curry richer and smoother.
Expected state: until golden removes its raw, starchy taste and adds a warm, toasty flavor that makes your curry richer and smoother.
Why and source
This step has reviewed source-backed guidance.
Step 7
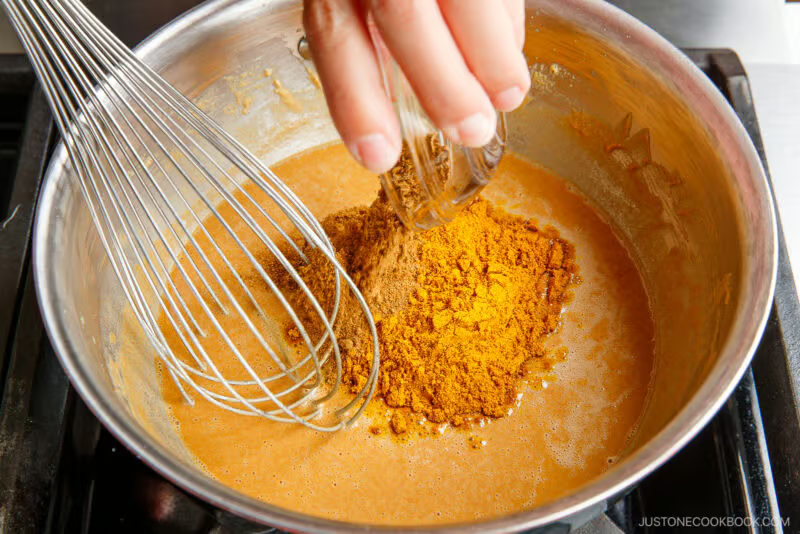
Add 4 Tbsp Japanese curry powder, 1 Tbsp garam masala, and ½ tsp cayenne pepper (optional) to the roux. Tip: If you can‘t find garam masala, you can add more curry powder or individual garam masala spices in its place.

Image detailsAdd 4 Tbsp Japanese curry powder, 1 Tbsp garam masala, and ½ tsp cayenne pepper (optional) to the roux. Tip: If you can‘t find garam masala, you can add more curry powder or individual garam masala spices in its place.Just One Cookbook · How to Make Japanese Curry Roux (Video) カレールーの作り方Dev reference Inputs and tools3
Uses
- 4 Tbsp Japanese curry powder
- 1 Tbsp garam masala ((see Notes))
- ½ tsp cayenne pepper ((optional))
Step 8
Cook and stir for 30 seconds and remove from the heat. You can use the roux immediately (see the instructions below) or mold it into a block.

Image detailsCook and stir for 30 seconds and remove from the heat. You can use the roux immediately (see the instructions below) or mold it into a block.Just One Cookbook · How to Make Japanese Curry Roux (Video) カレールーの作り方Dev reference Checks1
TimingInfoTimingfor 30 seconds
Target: 1 minute
Expected state: Cook and stir for 30 seconds and remove from the heat.
Why and source
This step has reviewed source-backed guidance.
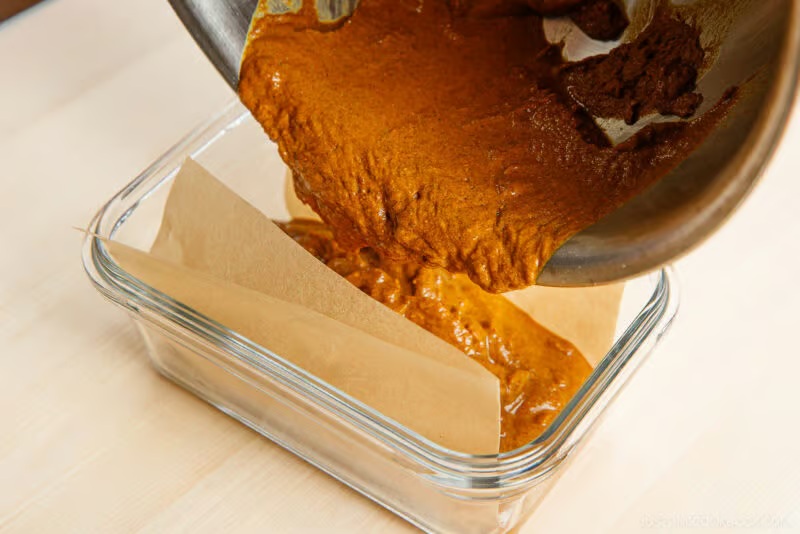
Step 9
Transfer the roux to a glass or metal container lined with parchment paper. Let it cool completely on the kitchen counter, then refrigerate to solidify overnight.

Image detailsTransfer the roux to a glass or metal container lined with parchment paper. Let it cool completely on the kitchen counter, then refrigerate to solidify overnight.Just One Cookbook · How to Make Japanese Curry Roux (Video) カレールーの作り方Dev reference Checks1
HoldingMain recipeSource holding instruction
Transfer the roux to a glass or metal container lined with parchment paper. Let it cool completely on the kitchen counter, then refrigerate to solidify overnight.
Why and source
This step has reviewed source-backed guidance.
Step 10
The next day, take out the curry block from the container. If the curry block gets stuck to the container, release it with a butter knife or an offset spatula.
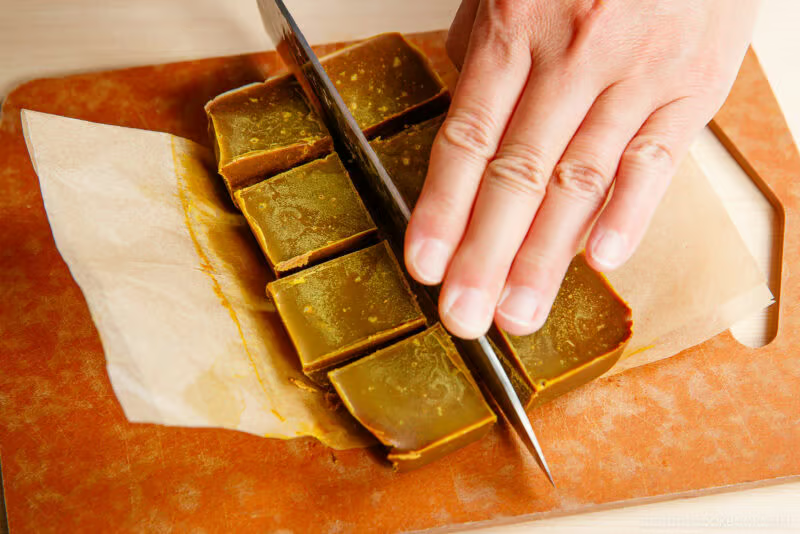
Step 11
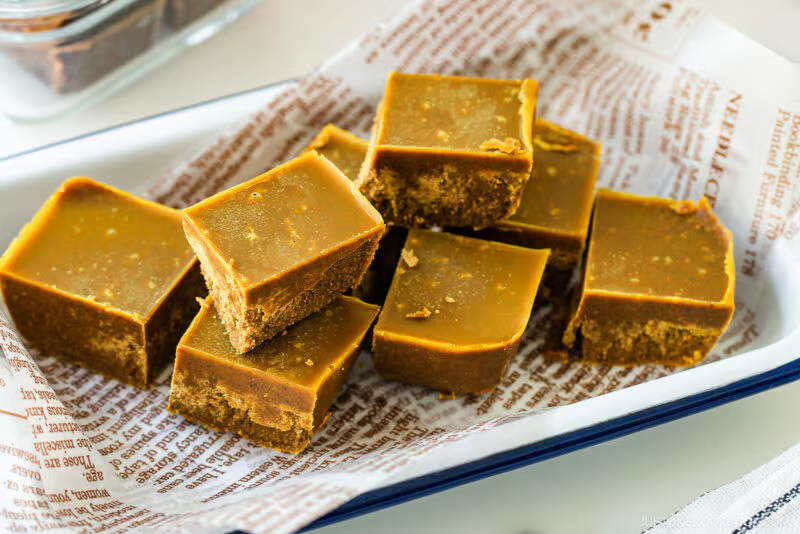
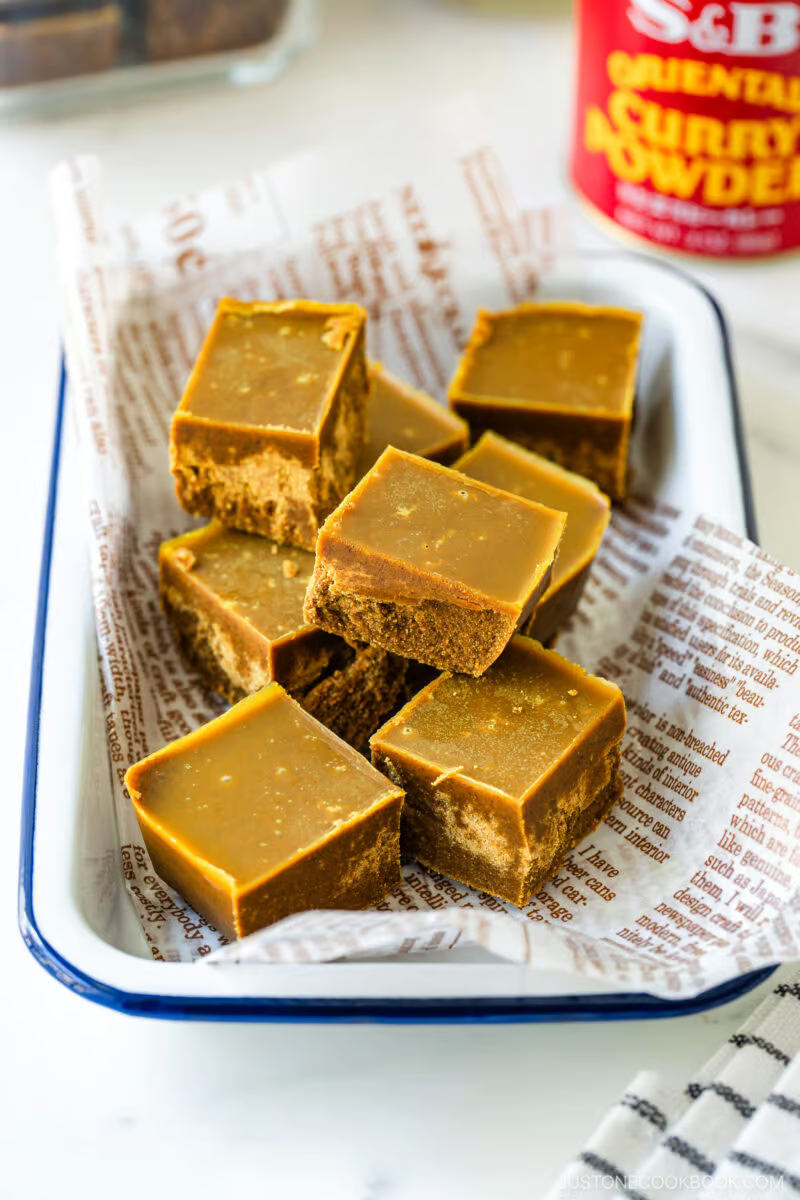
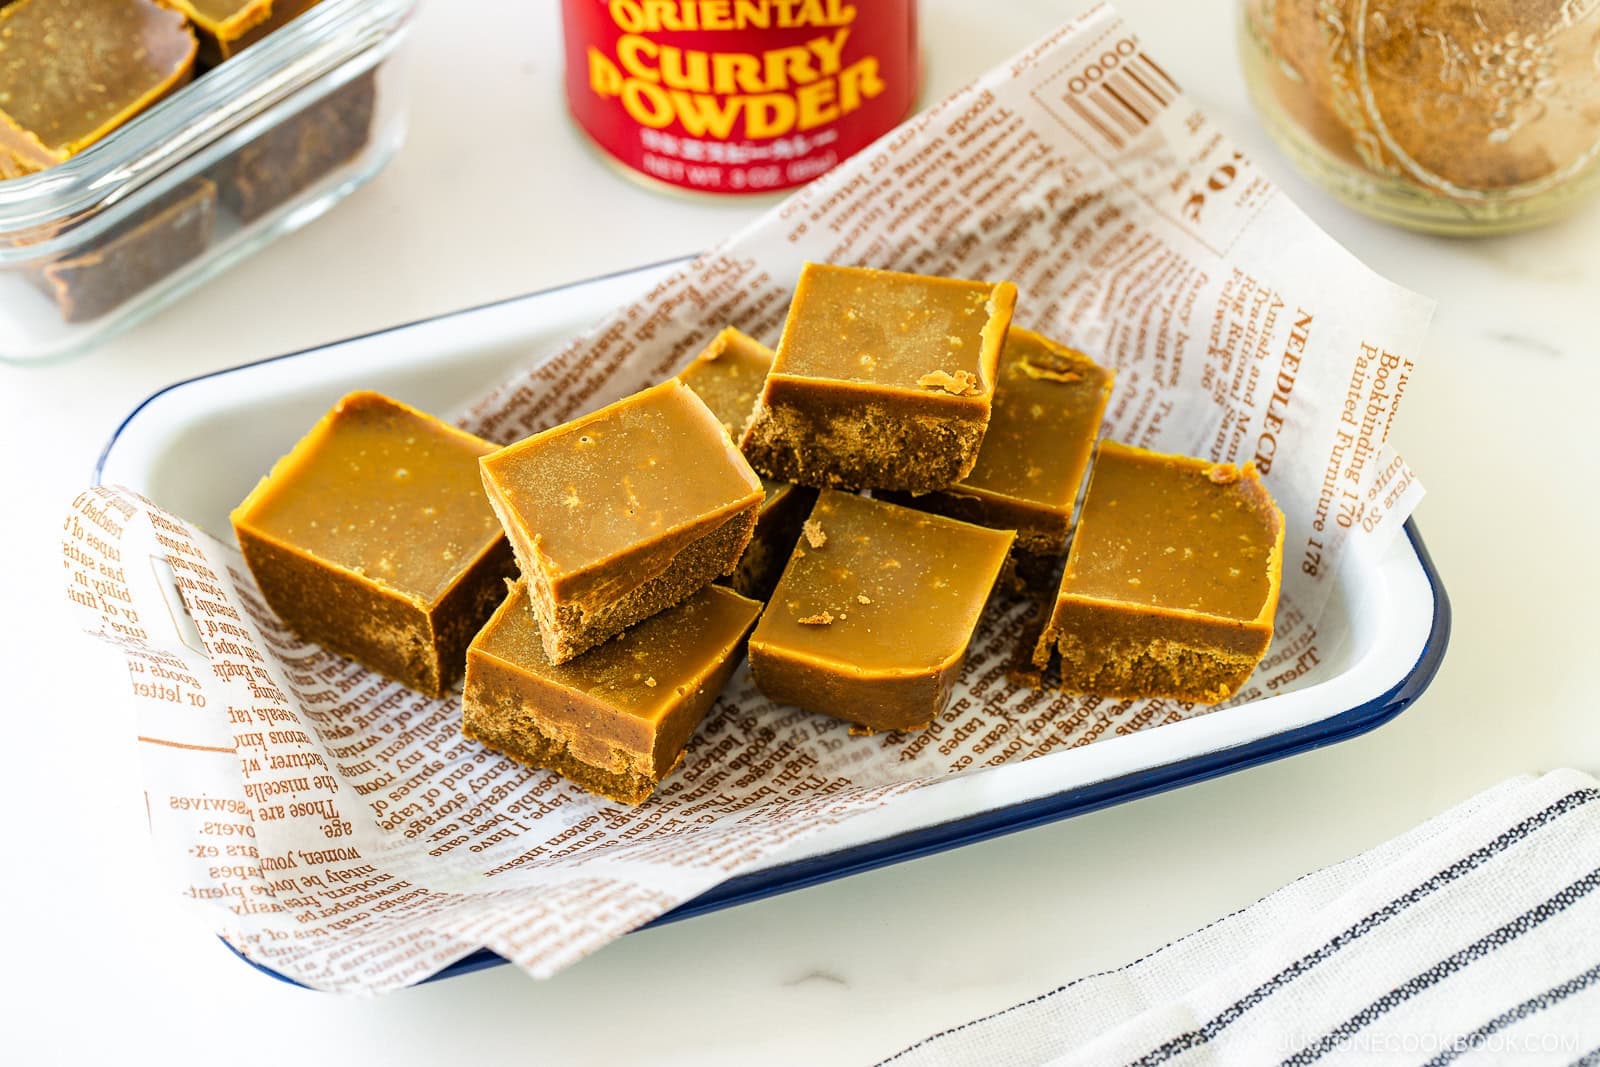
With a sharp knife, cut the block into 8 cubes, about 1 x 1 inch (2.5 x 2.5 cm) each. Transfer the curry roux squares to a glass container.
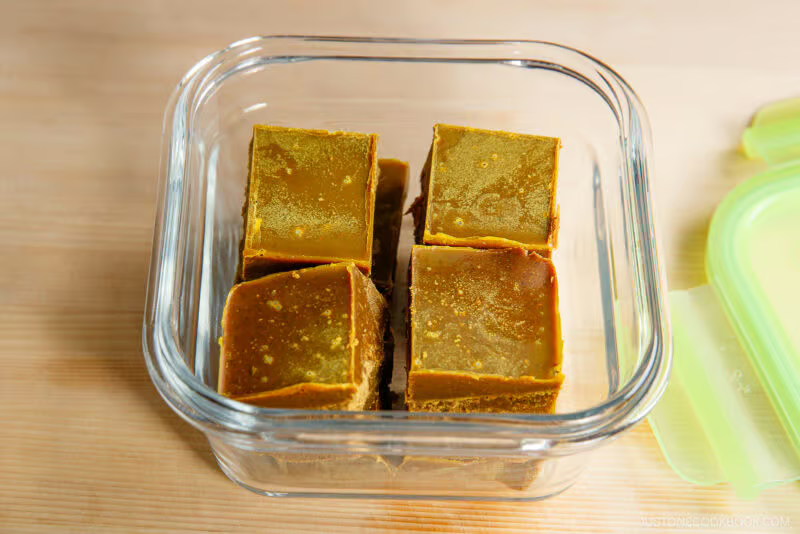
Step 12
Store in the refrigerator for 1 month or in the freezer for 3–4 months. Use them soon for the best flavor and aroma.

Image detailsStore in the refrigerator for 1 month or in the freezer for 3–4 months. Use them soon for the best flavor and aroma.Just One Cookbook · How to Make Japanese Curry Roux (Video) カレールーの作り方Dev reference Checks1
HoldingMain recipeSource holding instruction
Store in the refrigerator for 1 month or in the freezer for 3–4 months. Use them soon for the best flavor and aroma.
Why and source
This step has reviewed source-backed guidance.
Step 13
Very important! Please season your final dish with more salt, as the homemade roux is unsalted. I usually add 2–4 tsp salt per serving (one block) to the broth of my curry sauce recipe. Store-bought curry roux is quite salty, so you may want to add more salt to achieve a similar taste.
Step 14
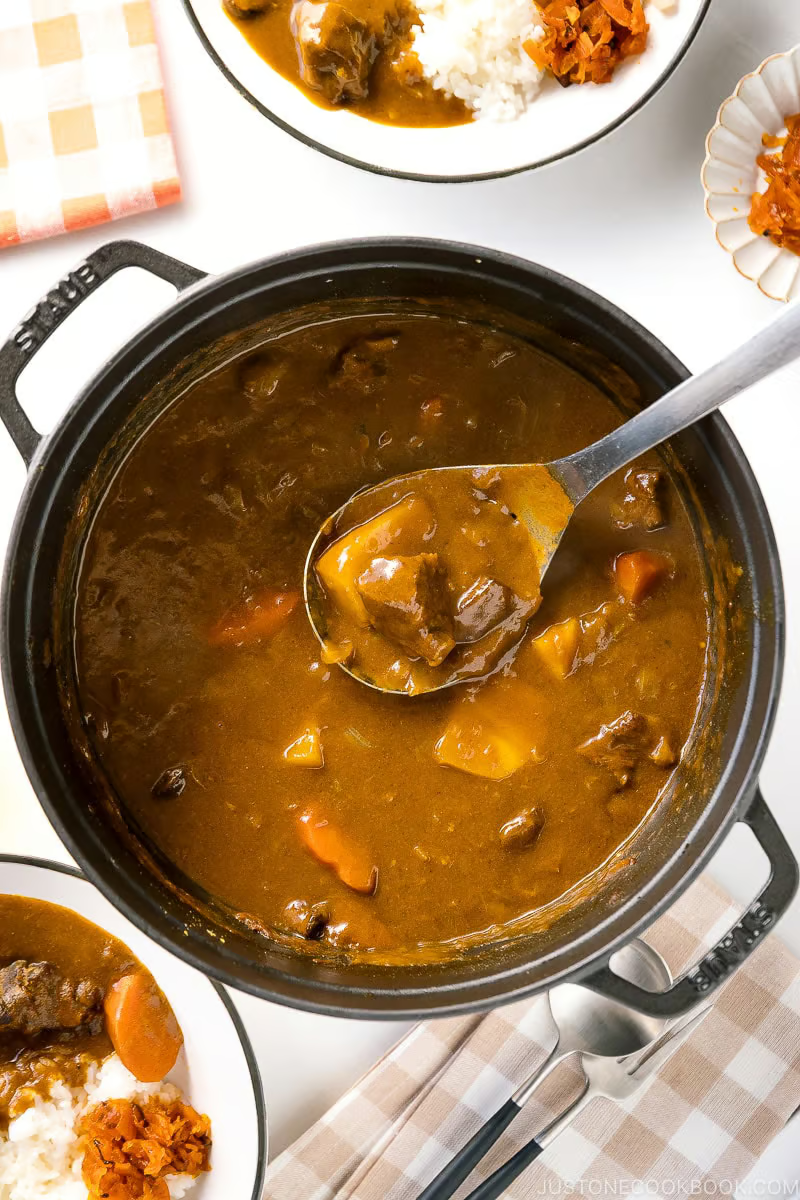
Add the roux cubes or curry roux mixture (before it solidifies) to the broth of your curry recipe. Follow the recipe instructions on when to add it. Try it in recipes like my Chicken Curry, Instant Pot Curry, Vegetarian Curry, Beef Curry, Keema Curry, and Curry Udon.
Step 15
How much roux should we use? Roughly 6–7 cubes of this recipe are equivalent to one box of store-bought curry roux (that requires 4 cups or 1L of broth/water). Simmer over low heat for 5–10 minutes. Heat will thicken the roux.
low heatStep 16
If the curry flavor is lacking or the curry does not thicken, add more roux. When you add meat and/or veggies, they release more moisture to the broth; therefore, you will need to adjust the amount of roux you use according to what you’re cooking.
Handling and Storage
Reviewed hold, storage, make-ahead, and service-timing guidance.
Assemble
Mold the mixture in an airtight glass or metal container lined with parchment paper.
Cool, then refrigerate overnight to solidify. Cut the firm roux into cubes the next day and store in a glass container until ready to use.

Show 1 more media item
Learn More
Extra cooking notes, tests, and source details kept out of the step-by-step method.
Why this works
Quick kitchen reasons behind the main choices.
Why I Love This Recipe
Made with all-natural ingredients – No chemical seasonings, preservatives, or artificial flavors.
Easy to customize for your preferred taste and spice level, plus it’s unsalted. This is one of the simplest DIY recipes, and I was surprised by how easy it was the first time I made it.
How many roux cubes match a box of curry?
Six to seven homemade cubes equal one store-bought box designed for 4 cups (1 liter) of broth.
Article photos
Photos used with the article notes.
Source: How to Make Japanese Curry Roux (Video) カレールーの作り方
Recipe structure
Components and intermediate outputs created by the method.
Main recipe
Recipe card ingredients and steps.
1, 1 block (8 cubes per block; 7 oz, 200 g; enough for 4 cups liquid)
Mixture
Source step 14 creates or uses mixture.
Sauce
Source step 13 creates or uses sauce.
Extra useful notes
Short source-backed recommendations and facts that do not need a step.
Different garam masala blends can vary significantly in intensity and flavor profile, so adjust the amount to taste!
Different garam masala blends can vary significantly in intensity and flavor profile, so adjust the amount to taste!
More source notes
Useful article notes that do not need to interrupt the cooking method.
Notes
Different garam masala blends can vary significantly in intensity and flavor profile, so adjust the amount to taste!
Recipe Utilities
Account actions, source details, export, and reporting stay available without interrupting the cooking flow.
Source and Origin
Origin declaration
Adapted from source
Imported from the just-one-cookbook page for dev review.
Copy risk: Unchecked
How to Make Japanese Curry Roux (Video) カレールーの作り方
Article
View source
My Kitchen Actions
Login is required.
My Kitchen keeps saved recipes, private notes, adaptations, cooking logs, imports, and exports tied to your account.
Export
Public recipe exports include only approved public content. Personal backup exports require login.
Export history
No exports yet.