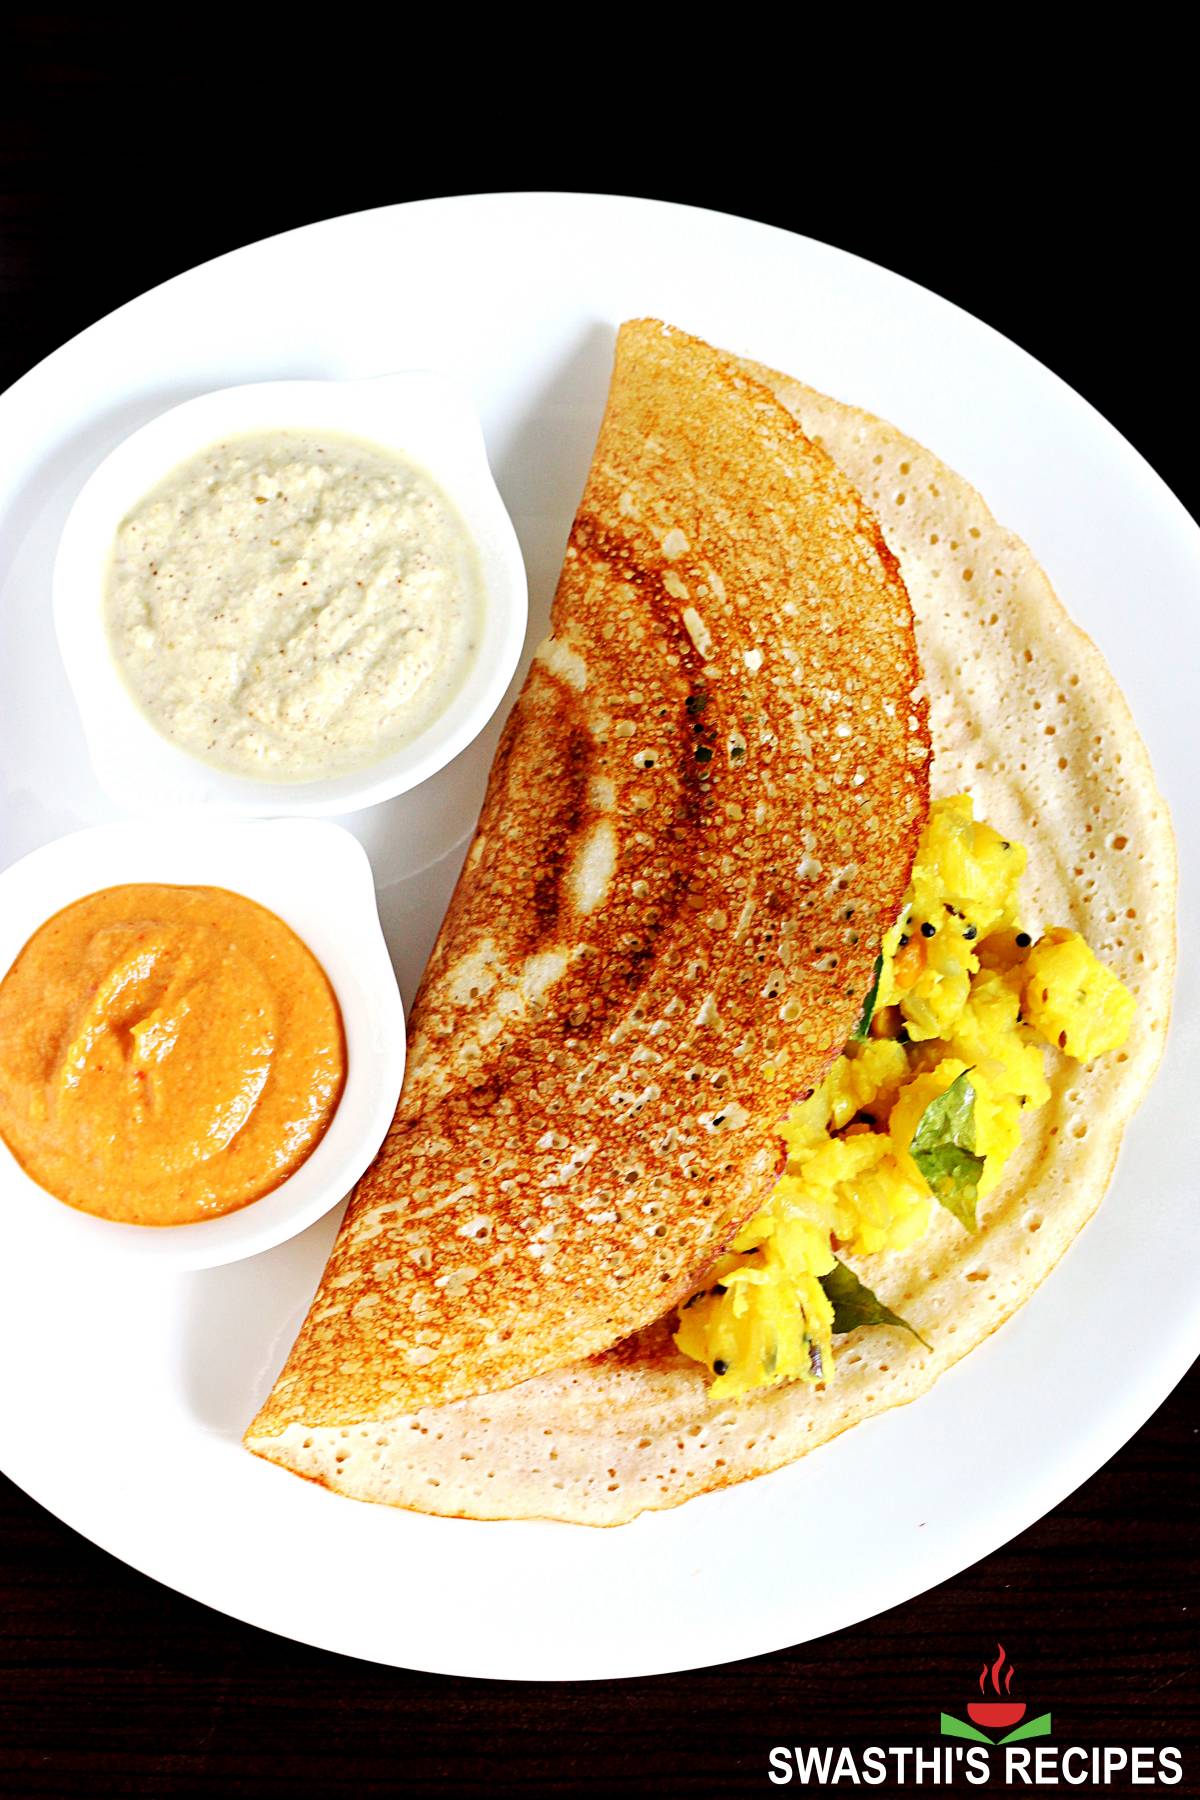
Dosa Recipe with homemade Dosa Batter
Dosa recipe with step by step photo guide that includes everything from scratch including making dosa batter at home
Dish: Dosa Batter
- Total time
- 12 hr 25 min
- Active time
- 12 hr
- Yield
- 12, 12 dosas
- Difficulty
- Medium
- Equipment
- 2 required
Ingredients and Constraints
Ingredients
Ingredient watchpoints1 watchpoint
Short requirements and tradeoffs to check while gathering ingredients; detailed source notes stay expandable.
Cold Filtered Water
1¼ cups (300 ml) cold filtered water ((+ ¼ cup more as needed, divided - ¾ to 1 cup + ½ cup))
The source row includes a form, size, temperature, preparation, or handling detail.
Details and source
Additional ingredient notes
What you need
Ingredients Basically, Dosas can be made with only 2 ingredients – urad dal and rice.
But using other ingredients like chana dal, fenugreek seeds and flattened rice improve their texture, flavor and color. If you need an upgrade from basic to restaurant style, you have to use these. White urad dal also known as skinned black gram is the key ingredient & it’s available in 2 forms – whole and split. You may use any but I prefer whole. Chana dal (Bengal gram) imparts a nutty flavor and golden color to the dosa. You may sub them with toor dal – split pigeon peas, but you won’t get the same flavor and taste, it works in a pinch. Short grain raw rice like sona masuri is the best choice for the most perfect crisp golden restaurant dosas. Raw ponni, basmati rice (not sella) or 50/50 raw rice and short grain parboiled rice work but they will be lighter in color.
Ingredients
Basically, Dosas can be made with only 2 ingredients – urad dal and rice.
But using other ingredients like chana dal, fenugreek seeds and flattened rice improve their texture, flavor and color. If you need an upgrade from basic to restaurant style, you have to use these. White urad dal also known as skinned black gram is the key ingredient & it’s available in 2 forms – whole and split. You may use any but I prefer whole. Chana dal (Bengal gram) imparts a nutty flavor and golden color to the dosa. You may sub them with toor dal – split pigeon peas, but you won’t get the same flavor and taste, it works in a pinch. Short grain raw rice like sona masuri is the best choice for the most perfect crisp golden restaurant dosas. Raw ponni, basmati rice (not sella) or 50/50 raw rice and short grain parboiled rice work but they will be lighter in color.
Notes
It is essential to use cold water while blending else the batter can heat up.
Blend dal to a smooth & fluffy consistency and the rice to slightly coarse texture, this makes the best crispy dosas. The amount of water mentioned in the recipe is for whole skinned urad dal & raw rice with 4 to 5 hours of soaking. If you soak them longer or use another kind of rice or urad dal, you may need more or less water. To get the best golden and crispiest dosas consistently use raw sona masuri rice. Basmati rice, ponni and 50/50 raw & parboiled/idli rice work in a pinch but the results vary. To make the batter in wet grinder, triple the recipe. Soak the methi seeds separately. First add the soaked methi seeds to the wet grinder container.
Required setup
Equipment
oven turned ON at 100 F / 40 C for atleast 2
. To make smaller batches like this recipe, you don’t necessarily need a high speed blender like Vitamix or Blendtec. Something like a Nutribullet (900 W) works too. A wet grinder or an Indian mixer grinder is ideal & best if you are making larger batches and more often. These have steel containers which are plastic-free, so no or reduced microplastics in your batter. Dosa tawa/ griddle/ pan is available in different sizes and come in 4 types – cast iron, non-stick, granite and ceramic. If you are a beginner you may start learning to make dosa on a non-stick tawa (avoid teflon). Traditionally a cast iron tawa (ex: like a lodge 10.5”griddle) is used & it needs maintenance.
Method Overview
Structured method notes that are separate from the step timeline.
Equipment
Blender, grinder or a wet grinder – You need a good blender with at least 750 watts capacity to grind your soaked lentils and rice.
To make smaller batches like this recipe, you don’t necessarily need a high speed blender like Vitamix or Blendtec. Something like a Nutribullet (900 W) works too. A wet grinder or an Indian mixer grinder is ideal & best if you are making larger batches and more often. These have steel containers which are plastic-free, so no or reduced microplastics in your batter. Dosa tawa/ griddle/ pan is available in different sizes and come in 4 types – cast iron, non-stick, granite and ceramic. If you are a beginner you may start learning to make dosa on a non-stick tawa (avoid teflon). Traditionally a cast iron tawa (ex: like a lodge 10.5”griddle) is used & it needs maintenance.
How to ferment Dosa Batter
Cover and ferment it in a warm place until the batter rises and turns bubbly.
If you live in a warm region, you can leave it on the counter overnight. It may take anywhere from 8 to 16 hours depending on the temperature. To ferment in winter, place the bowl in a oven turned ON at 100 F / 40 C for atleast 2 to 3 hours & let ferment overnight with the oven turned off or oven light ON. Or Alternately, place the batter bowl in your instant pot steel insert, press yogurt settings with a timer set to 8 hours (12 to 14 hours during colder days). Use an external lid and not the IP lid. When I made this, I had to ferment for 16 hours in a closed kitchen cabinet. When properly fermented, the batter rises and turns light, fluffy with lots of pores & bubbles. The batter was half of the bowl before fermentation.
Make Dosa
Once your dosa batter is well fermented, stir it gently and take a required portion to a small bowl.
Keep the rest of the batter in the refrigerator for 2 weeks. The batter will be thick after fermentation. Add salt if you did not add earlier and may pour 1 to 2 tbsps little water only if required, to bring it to a pourable and spreading consistency. (only to the portion you are going to use now). (check video for consistency). Heat a dosa griddle/ tawa on a medium heat. When it is slightly hot, add a few drops of oil and spread it with a kitchen paper or a half cut onion (pierced with a fork/ butter knife on the rounded side to hold).This prevents the dosas from sticking to the pan. It is important not to leave excess oil on the griddle, so wipe down if required. To check if the pan is hot enough, sprinkle a few drops of water over the pan. If it is ready, it should sizzle.
Why should you use cold water to blend?
Cold water prevents your batter and the grinder/mixer/blender from heating up unnecessarily.
Warm batter may kill the yeast that got activated during soaking and the batter may not rise at all. If you live in a cold region you may use room temperature water.
Source video
Source video
Method Timeline
Prep
ActivePrep
12 hr
Prep time from the source recipe card.
Cook
ActiveCook
25 min
Cook time from the source recipe card.
Total
PassiveTotal
12 hr 25 min
Total time from the source recipe card.
Step 1
Add ½ cup urad dal (skinned black whole lentils), 2 tablespoon chana dal (Bengal gram) and ½ teaspoon methi seeds to a large bowl/pot. Add 1½ cups raw rice to another bowl.
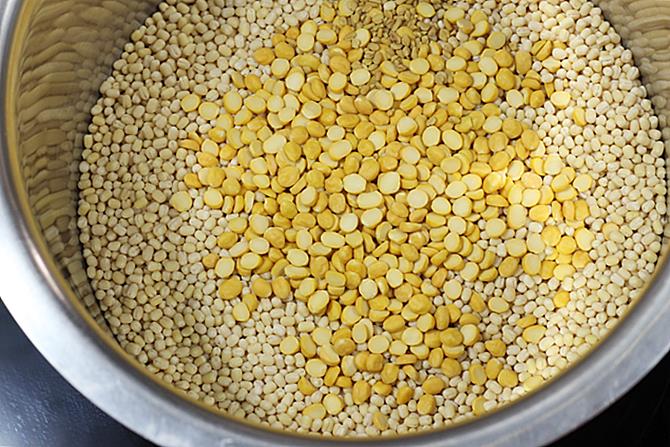
Image detailswashing dals for dosa recipeSwasthis Recipes · Dosa Recipe with homemade Dosa BatterDev reference Inputs and tools4
Uses
- 1½ cups (315 grams) raw rice ((sona masuri sub with ponni/ basmati rice, refer notes))
- ½ teaspoon (2.5 grams) methi seeds ((fenugreek seeds))
- ½ cup (100 grams) urad dal ((whole or split skinned black gram))
- 2 tablespoons (25 grams) chana dal ((Bengal gram))
Step 2
Rinse dal thoroughly a few times and soak in 3 cups filtered water for 5 to 6 hours. During cold weather they can be soaked even overnight.
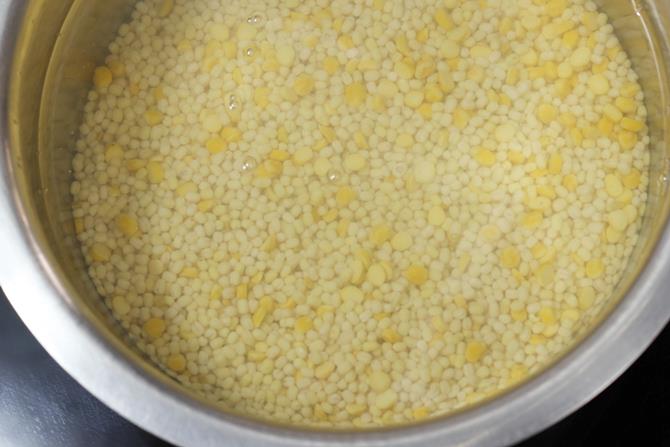
Image detailssoaking urad chana dals for dosa recipeSwasthis Recipes · Dosa Recipe with homemade Dosa BatterDev reference Checks1
TimingInfoTimingfor 5 to 6 hours
Target: 300-360 minute
Expected state: Rinse dal thoroughly a few times and soak in 3 cups filtered water for 5 to 6 hours.
Inputs and tools1
Uses
- 1¼ cups (300 ml) cold filtered water ((+ ¼ cup more as needed, divided - ¾ to 1 cup + ½ cup))
Why and source
This step has reviewed source-backed guidance.
Step 3
Rinse rice thrice or until the water runs a bit clear. Soak in 3 cups filtered water for 5 to 6 hours. Same here as well, during cold weather they can be soaked even overnight.
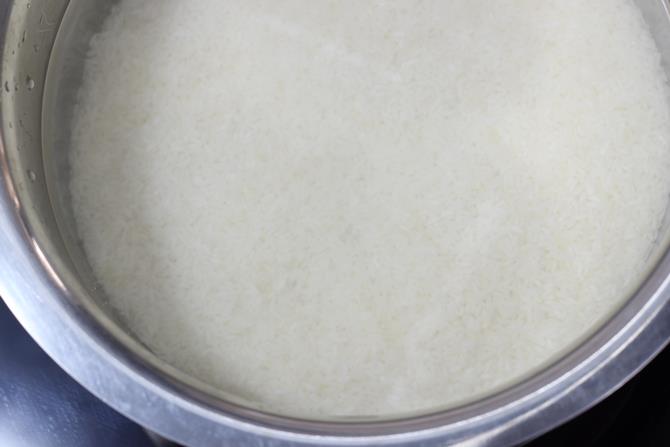
Image detailssoaking parboiled rice for dosa recipeSwasthis Recipes · Dosa Recipe with homemade Dosa BatterDev reference Visual cue
until the water runs a bit clear.
Checks2
Visual cueInfoVisualuntil the water runs a bit clear.
Expected state: until the water runs a bit clear.
TimingInfoTimingfor 5 to 6 hours
Target: 300-360 minute
Expected state: Soak in 3 cups filtered water for 5 to 6 hours.
Inputs and tools1
Uses
- 1¼ cups (300 ml) cold filtered water ((+ ¼ cup more as needed, divided - ¾ to 1 cup + ½ cup))
Why and source
This step has reviewed source-backed guidance.
Step 4
About 30 mins before blending the batter, rinse and soak 2 tablespoons poha (beaten rice) with ¼ cup filtered water.
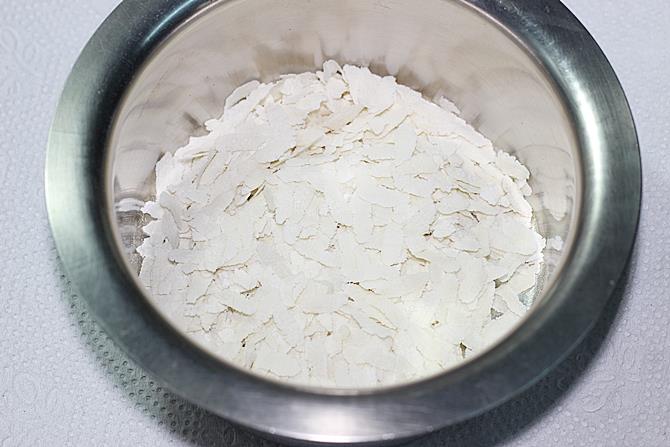
Image detailssoaking poha for dosaSwasthis Recipes · Dosa Recipe with homemade Dosa BatterDev reference Checks1
TimingInfoTimingAbout 30 mins
Target: 30 minute
Expected state: About 30 mins before blending the batter, rinse and soak 2 tablespoons poha (beaten rice) with ¼ cup filtered water.
Inputs and tools2
Uses
- 2 tablespoons (15 grams) poha ((flattened rice))
- 1¼ cups (300 ml) cold filtered water ((+ ¼ cup more as needed, divided - ¾ to 1 cup + ½ cup))
Why and source
This step has reviewed source-backed guidance.
Step 5
Add soaked poha to the grinder jar or instant pot steel insert first. Drain the water completely from dal and pour ¾ cup cold filtered water.
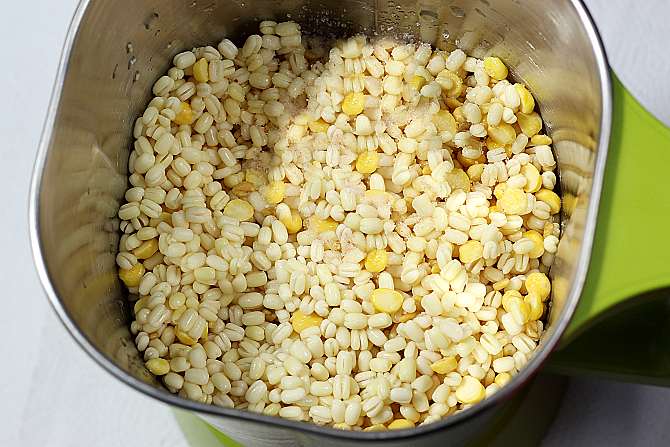
Image detailsMake Dosa BatterSwasthis Recipes · Dosa Recipe with homemade Dosa BatterDev reference Inputs and tools1
Uses
- 1¼ cups (300 ml) cold filtered water ((+ ¼ cup more as needed, divided - ¾ to 1 cup + ½ cup))
Step 6
Blend until smooth, frothy and bubbly. If needed add more water. I add another 2 to 4 tablespoons water. But do not make it thin or runny. It must be a thick batter yet of pouring consistency. (Check video for consistency)
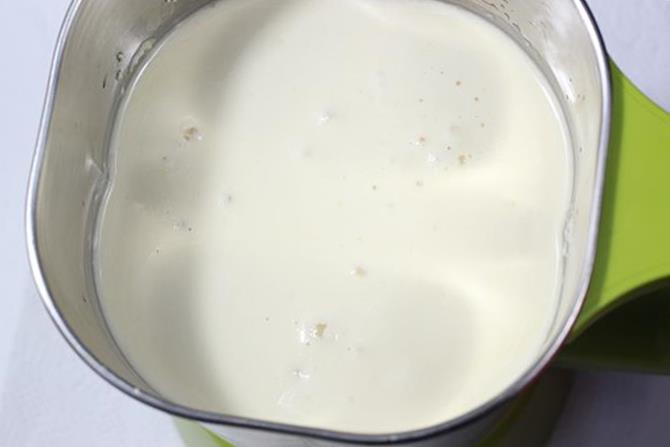
Image detailssmooth frothy urad dal batter for dosa recipeSwasthis Recipes · Dosa Recipe with homemade Dosa BatterDev reference Visual cue
until smooth, frothy and bubbly.
Checks1
TextureInfoTextureuntil smooth, frothy and bubbly.
Expected state: until smooth, frothy and bubbly.
Inputs and tools1
Uses
- 1¼ cups (300 ml) cold filtered water ((+ ¼ cup more as needed, divided - ¾ to 1 cup + ½ cup))
Why and source
This step has reviewed source-backed guidance.
Step 7
Transfer the batter to a a large bowl. Drain rice completely and add to the blender jar. Pour ½ cup water.
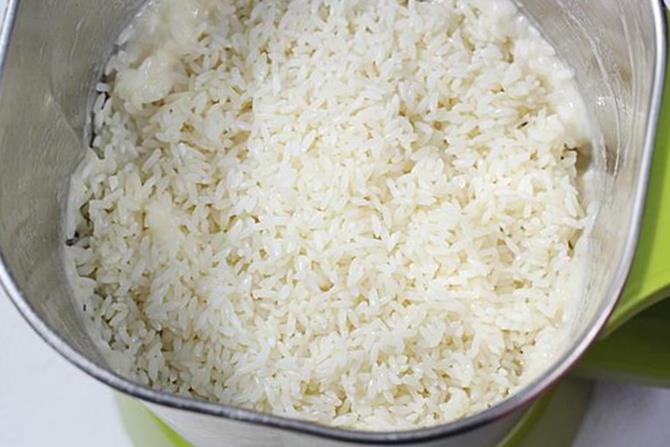
Image detailsblending rice for dosa recipeSwasthis Recipes · Dosa Recipe with homemade Dosa BatterDev reference Inputs and tools1
Uses
- 1¼ cups (300 ml) cold filtered water ((+ ¼ cup more as needed, divided - ¾ to 1 cup + ½ cup))
Step 8
Blend to a slightly coarse batter.(not as coarse as semolina/suji)
Step 9
Add the rice batter to the urad dal batter. During winters you may add half teaspoon sea salt (non-iodized) & mix at this stage to help with fermentation. Mix well. The warmth in your hand is said to help in fermentation if want you may use your hand but I don’t. The prepared batter must be of pouring consistency yet thick and not runny. Very thick or runny batter won’t ferment well, so right consistency is important. (check video for consistency) When I make 2x & 3x recipe, I use 2 glass or ceramic/steel bowls to ferment and refrigerate the dosa batter. I divide and distribute the batter to 2 bowls. Undisturbed batter stays good in refrigerator for longer without going sour.
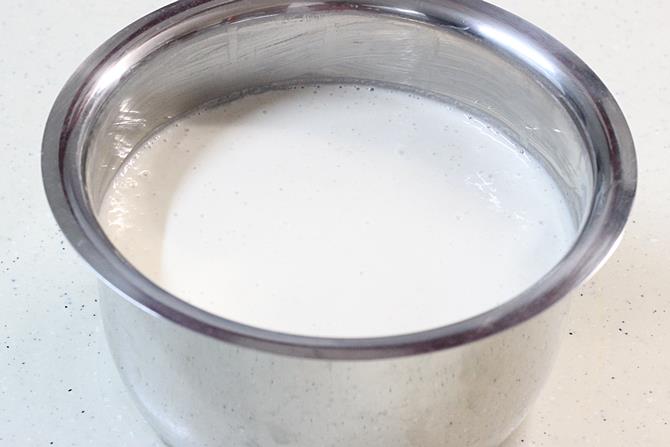
Image detailsfermenting batterSwasthis Recipes · Dosa Recipe with homemade Dosa BatterDev reference Inputs and tools1
Uses
- ½ teaspoon sea salt ((non iodized salt if using before fermentation))
Step 10
Cover and ferment it in a warm place until the batter rises and turns bubbly. If you live in a warm region, you can leave it on the counter overnight. It may take anywhere from 8 to 16 hours depending on the temperature. To ferment in winter, place the bowl in a oven turned ON at 100 F / 40 C for atleast 2 to 3 hours & let ferment overnight with the oven turned off or oven light ON. Or Alternately, place the batter bowl in your instant pot steel insert, press yogurt settings with a timer set to 8 hours (12 to 14 hours during colder days). Use an external lid and not the IP lid.
OvenStep 11
When I made this, I had to ferment for 16 hours in a closed kitchen cabinet. When properly fermented, the batter rises and turns light, fluffy with lots of pores & bubbles. The batter was half of the bowl before fermentation. It rose a little over ¾. Fermentation test: To check, drop half a spoon of this batter into a bowl of water. Well fermented batter floats.
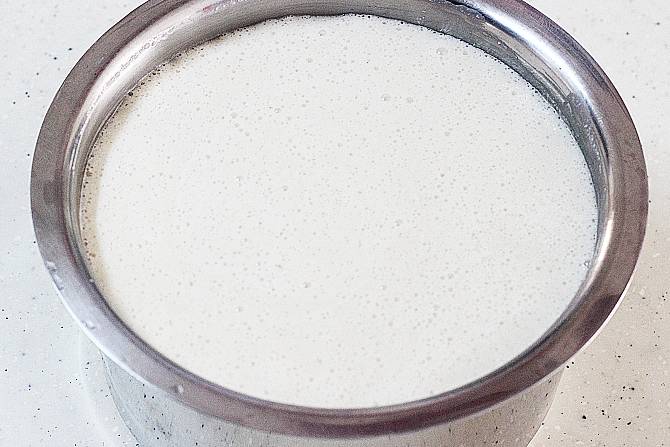
Image detailsdosa batter recipeSwasthis Recipes · Dosa Recipe with homemade Dosa BatterDev reference Checks1
TimingInfoTimingfor 16 hours
Target: 960 minute
Expected state: When I made this, I had to ferment for 16 hours in a closed kitchen cabinet.
Inputs and tools1
Uses
- 1¼ cups (300 ml) cold filtered water ((+ ¼ cup more as needed, divided - ¾ to 1 cup + ½ cup))
Why and source
This step has reviewed source-backed guidance.
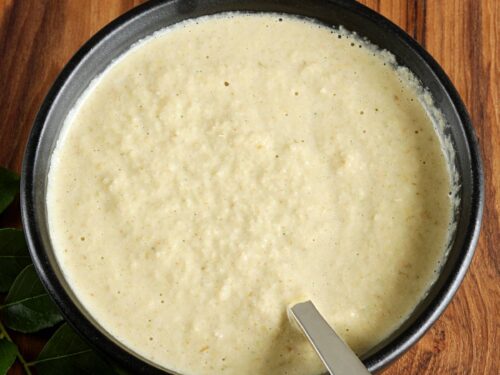
Step 12
This is a closeup shot of how the batter looks after fermentation.
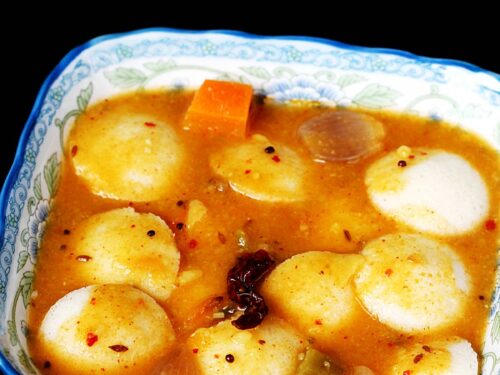
Step 13
Do not over ferment the dosa batter as it turns sour and the batter is not so good to spread on the griddle. This is a picture of over fermented batter just for your reference.
Step 14
Once your dosa batter is well fermented, stir it gently and take a required portion to a small bowl. Keep the rest of the batter in the refrigerator for 2 weeks. The batter will be thick after fermentation. Add salt if you did not add earlier and may pour 1 to 2 tbsps little water only if required, to bring it to a pourable and spreading consistency. (only to the portion you are going to use now). (check video for consistency).
Step 15
Heat a dosa griddle/ tawa on a medium heat. When it is slightly hot, add a few drops of oil and spread it with a kitchen paper or a half cut onion (pierced with a fork/ butter knife on the rounded side to hold). This prevents the dosas from sticking to the pan. It is important not to leave excess oil on the griddle, so wipe down if required.
medium heatStep 16
To check if the pan is hot enough, sprinkle a few drops of water over the pan. If it is ready, it should sizzle. Reduce the heat to low or medium, stir the batter with a ladle and take a ladle (¼ cup) of dosa batter & pour in the center of the hot griddle/ tawa.
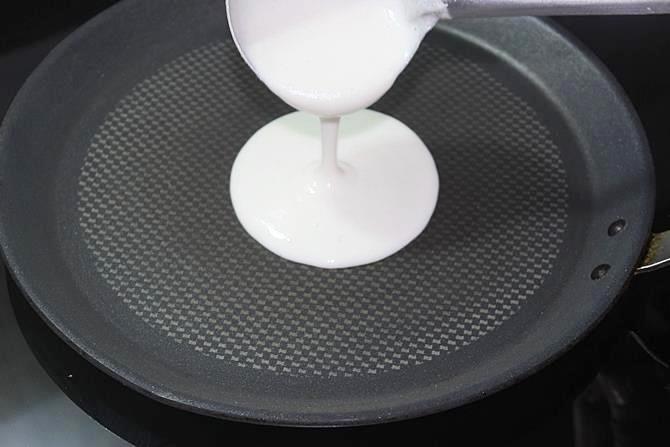
Image detailsPouring batter on tawaSwasthis Recipes · Dosa Recipe with homemade Dosa BatterDev reference Inputs and tools1
Uses
- 1¼ cups (300 ml) cold filtered water ((+ ¼ cup more as needed, divided - ¾ to 1 cup + ½ cup))
Step 17
Immediately begin to spread it evenly with the base of the ladle – starting from the center, in an outward circular motion in a clockwise direction. (Check photos or video in the post) Troubleshooting tip: If you are unable to spread the batter because it got stuck to the pan, it means either the pan is too hot or the batter is too thick. Reduce the flame and cool down the pan slightly. If that doesn’t work then pour little more water to your batter to bring to right consistency. Also too much oil on the empty pan won’t let you spread the batter well.
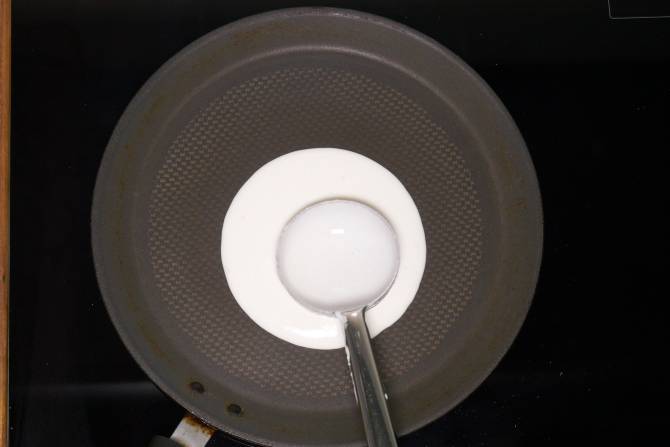
Image detailsspreading dosa batter on the griddleSwasthis Recipes · Dosa Recipe with homemade Dosa BatterDev reference Checks1
HoldingMain recipeSource holding instruction
Immediately begin to spread it evenly with the base of the ladle – starting from the center, in an outward circular motion in a clockwise direction. (Check photos or video in the post) Troubleshooting tip: If you are unable to spread the batter because it got stuck to the pan, it means either the pan is too hot or the batter is too thick. Reduce the flame and cool down the pan slightly. If that doesn’t work then pour little more water to your batter to bring to right consistency. Also too much oil on the empty pan won’t let you spread the batter well.
Inputs and tools1
Uses
- 1¼ cups (300 ml) cold filtered water ((+ ¼ cup more as needed, divided - ¾ to 1 cup + ½ cup))
Why and source
This step has reviewed source-backed guidance.
Step 18
This is how your dosa should look.
Step 19
Increase the heat to medium high or high and drizzle 1 tsp oil/ghee/ butter across the edges & on the dosa. The edges of the dosa will begin to leave/ come off the pan when done.
Step 20
Cook until the base turns golden & crisp. Run a thin wooden turner/spatula across the base of the dosa, starting from the edges to the center. Optional – If you want you may cook on the other side – turn it to the other side and cook for a minute. Turn again and cook the base for 30 seconds to crisp it.
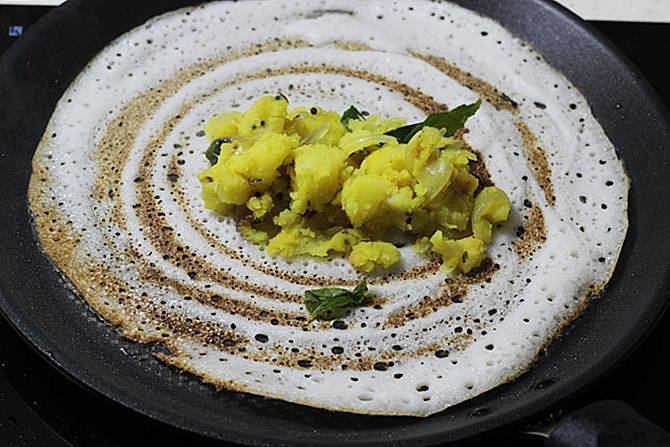
Image detailsgolden fried masala dosa recipeSwasthis Recipes · Dosa Recipe with homemade Dosa BatterDev reference Visual cue
until the base turns golden & crisp.
Checks2
TextureInfoTextureuntil the base turns golden & crisp.
Expected state: until the base turns golden & crisp.
TimingInfoTimingfor 30 seconds
Target: 1 minute
Expected state: Turn again and cook the base for 30 seconds to crisp it.
Why and source
This step has reviewed source-backed guidance.
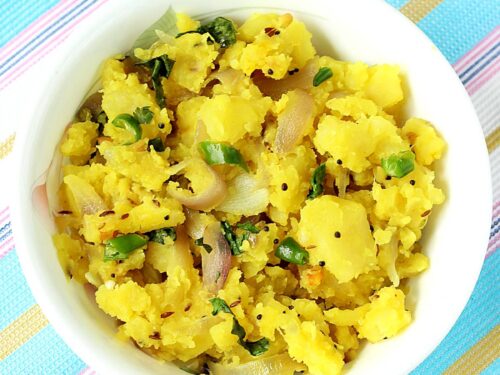
Step 21
Since I made the masala dosa, I used this potato masala for filling. Plain dosa is most commonly served with coconut chutney. Fold the dosa and remove to a serving plate. Before making the next dosa, reduce the heat to low. You can also rub the cut onion and then pour the batter. Make sure there is no excess oil on the pan. Serve the dosa right away when it is hot. They begin to soften as they cool down.
Image detailsDosa recipe with homemade batter served with chutneySwasthis Recipes · Dosa Recipe with homemade Dosa BatterDev reference Image detailsgolden fried masala dosa recipeSwasthis Recipes · Dosa Recipe with homemade Dosa BatterDev reference Checks1
HoldingMain recipeSource holding instruction
Since I made the masala dosa, I used this potato masala for filling. Plain dosa is most commonly served with coconut chutney. Fold the dosa and remove to a serving plate. Before making the next dosa, reduce the heat to low. You can also rub the cut onion and then pour the batter. Make sure there is no excess oil on the pan. Serve the dosa right away when it is hot. They begin to soften as they cool down.
Why and source
This step has reviewed source-backed guidance.
Troubleshooting
Reviewed failure and correction notes from process controls.
Texture Too Thick or Thin
Batter clumps while spreading either on the pan or to the back of the ladle – batter too thick, thin it down slightly.
Batter clumps while spreading either on the pan or to the back of the ladle – batter too thick, thin it down slightly.
Prevention
Batter turns extremely light and bubbly or dosas are extremely light – whisk the batter well to collapse some of the bubbles and make sure you are using only raw rice like sona masuri.
Handling and Storage
Reviewed hold, storage, make-ahead, and service-timing guidance.
When to add salt?
The most debated topic in South Indian Cuisine is “when to add salt to idli dosa batter?” Every South Indian home has a different answer to this, based on their experience.
So experimenting is essential to know what works for you. Adding salt before fermentation: Pro – It is ideal to add sea salt/ Indian rock salt (or non-iodized salt) before fermentation during winters as these natural unrefined salts helps with the fermentation process. However you should avoid using table salt and iodized salt as they inhibit the growth of yeast required for fermentation. If you use an equipment (instant pot/oven/) to ferment your batter, adding salt early before fermentation is not required. Con – By adding salt to the entire batter, you lose the chance to store it longer. Salted batter often turns too sour within a week while unsalted batter keeps good for 2 to 3 weeks.
Learn More
Extra cooking notes, tests, and source details kept out of the step-by-step method.
Why this works
Quick kitchen reasons behind the main choices.
My Recipe
I’ve grown-up eating my Mom’s crispy Dosas & soft Idlis every single day of my life.
I’ve cooked many thousands of dosas for my family & friends because these are a staple in my home, making up 5 to 6 meals every week. Traditional dosai were much thicker than they are today, in the modern days.
Can I soak dal & rice together?
This is the next most FAQ.
Traditionally they are always soaked separately because the lentils are supposed to be ground to a fluffy and smooth texture while the rice is ground to a slightly coarse texture. It is believed the fluffy texture of the dal helps make dosas lighter and the coarse texture of rice gives the required crispiness to the dosa.
Faqs
What is the correct ratio for dosa?
Every restaurant and household has a different ratio. In Karnataka a 1:3 ratio, in Andhra Pradesh 1:2 ratio and in Tamilnadu and Kerala 1:4 ratios of urad dal & rice are used respectively.
Article photos
Photos used with the article notes.


Source: Dosa Recipe with homemade Dosa Batter
Testing notes
Useful tests and side-by-side notes after the method is clear.
What’s the difference between raw rice and parboiled rice?
Raw rice comes directly by milling paddy after harvesting and drying.
Whereas parboiled rice comes from milling paddy that has been boiled with the husk/bran intact which preserves some of the nutrients like fiber and minerals. This kind of rice is low in starch, meaning lesser carbs than raw rice.
Recipe structure
Components and intermediate outputs created by the method.
Main recipe
Recipe card ingredients and steps.
12, 12 dosas
Batter
Source step 4 creates or uses batter.
Filling
Source step 21 creates or uses filling.
Extra useful notes
Short source-backed recommendations and facts that do not need a step.
It is essential to use cold water while blending else the batter can heat up.
It is essential to use cold water while blending else the batter can heat up.
Blend dal to a smooth & fluffy consistency and the rice to slightly coarse texture, this makes the best crispy dosas.
Blend dal to a smooth & fluffy consistency and the rice to slightly coarse texture, this makes the best crispy dosas.
The amount of water mentioned in the recipe is for whole skinned urad dal & raw rice with 4 to 5 hours of soaking.
The amount of water mentioned in the recipe is for whole skinned urad dal & raw rice with 4 to 5 hours of soaking. If you soak them longer or use another kind of rice or urad dal, you may need more or less water.
To get the best golden and crispiest dosas consistently use raw sona masuri rice.
To get the best golden and crispiest dosas consistently use raw sona masuri rice. Basmati rice, ponni and 50/50 raw & parboiled/idli rice work in a pinch but the results vary.
To make the batter in wet grinder, triple the recipe.
To make the batter in wet grinder, triple the recipe. Soak the methi seeds separately. First add the soaked methi seeds to the wet grinder container. Begin to grind sprinkling water little by little. After sometime it will become fluffy, thick and frothy. Then add the urad dal and poha blend until fluffy. Followed by rice. If your wet grinder does a very good job, then you can also add dal, rice and poha together.
Mention @SwasthisRecipes or tag #swasthisrecipes!
Mention @SwasthisRecipes or tag #swasthisrecipes!
Recipe Utilities
Account actions, source details, export, and reporting stay available without interrupting the cooking flow.
Source and Origin
Origin declaration
Adapted from source
Imported from the swasthis-recipes page for dev review.
Copy risk: Unchecked
Dosa Recipe with homemade Dosa Batter
Article
View source
My Kitchen Actions
Login is required.
My Kitchen keeps saved recipes, private notes, adaptations, cooking logs, imports, and exports tied to your account.
Export
Public recipe exports include only approved public content. Personal backup exports require login.
Export history
No exports yet.